You can find out more about this theme at theme frequently asked question page.
Please check your Blogr-AMP theme version.
This Blogr-AMP theme documentation is for Version 2-0-0. Users using Blogr-AMP theme version 1-0-0 and below, please forward to Version 1-0-0 documentation. Thank you.
Theme Installation
Install Blogger Template
This section covers basic Blogger template installation & settings user might consider to further prepare to optimize blog.


At


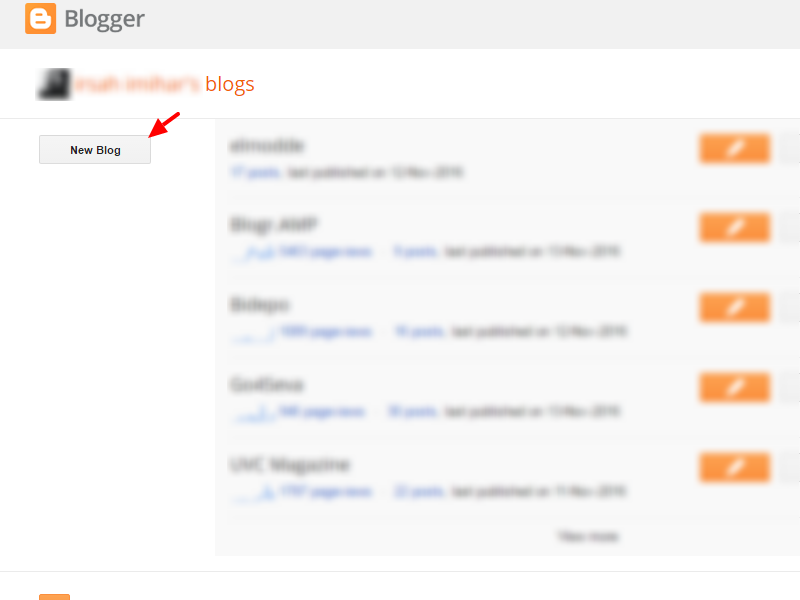
Create Blog
At Blogger dashboard clickNew Blog > on window screen > add blog Title > add/check blog url availability > select default Simple blog template > click Create Blog!Setup Optimization Blog Settings
Turn off Blogger Mobile Template
This blog template setup uses Accelerated Mobile Pages AMP HTML features, it is required to turn off Blogger's Mobile Template.Enable Meta Description
Enable blog pages & post meta description by adding text not more than 160 characters.Allow blog feed to full
By allowing blog feed to full will display Featured section accurately.Create Sample Posts
Upload sample posts.Upload Template HTML
Find downloaded theme files,unzipped, continue to folder .../Upload/Template/ & open the template files with your favorite text editor. Select all and copy the contents in this file.At
Blogger Dashboard > Template HTML > select All existing template codes (Ctrl+A for Windows) and paste the copied template codes. Click Save Template.Layout - Theme Dashboard
Theme custom dashboard layout with pre-installed Blogger widgets. Each section has indicators for customizing references which will help theme setup easily.
Add, remove, re-arrange or customize Blogger widgets accordingly.
No 3rd party apps required, you in full control.

Add, remove, re-arrange or customize Blogger widgets accordingly.
No 3rd party apps required, you in full control.
Compatible with published posts and theme changes. No post preparation & edits required.
Writing & publishing new blog posts has no changes. Upload image, video, align text as normally would.
Always a good practice to assign blog posts with several related Labels & add text to further describe the posts atSearch Descriptionsection located at post editor right sidebar.
Layout and Widgets
Slide Out Sidebar
Views:
Customization for slide out sidebar to enable view in dashboard & edit/update Blogger widgets pre-installed within this section.

Click
At Label widget select label to display or tick at
At HTML/Javascript widget, add links or text in widget body.
Use AMP image components for images & no javascript allowed. Below is an example used on an HTML/Javascript widget to create links.

To change/update
In Theme > Edit HTML update the attribute value at the above variable.
Customization for slide out sidebar to enable view in dashboard & edit/update Blogger widgets pre-installed within this section.
- Add, remove & arrange Blogger widgets accordingly.
- Strict AMP tags & components required.
- Javascripts not allowed.
- Adding additional Blogger widgets requires to remove
<b:include name="quick-edit"/>. - Reference:
<amp-sidebar/>

Customizing Assigned Blogger Widgets
Click
Edit the assigned widgets.At Label widget select label to display or tick at
All labels to automatically display all available label attached to blog posts.At HTML/Javascript widget, add links or text in widget body.
Use AMP image components for images & no javascript allowed. Below is an example used on an HTML/Javascript widget to create links.
<amp-sidebar> positioning
amp-sidebar can be positioned sliding out from left or right of screen. By default, the amp-sidebar is sliding out from right of screen.To change/update
amp-sidebar to slide form left of screen, at amp-sidebar element, update/change its attribute side='...' & replace right with left. Save Template & preview changes. Below is an example to slide from left.<amp-sidebar id='offcanvas' layout='nodisplay' side='left'>
<amp-sidebar> Title
var='ampsidebarTitle'In Theme > Edit HTML update the attribute value at the above variable.
Header
Views:


Header Logo/Title
Change text & upload image as blog logo.Main Navigation
Views:


- Add text and URL to link to pages
Featured Posts Carousel (Homepage)
Views:


- Uses custom Popular Posts widget with
amp-carouselfunctionalities. - Click edit and custom set widget & post display
Main Section (Blog Post Gadget)
Views:

Un-tick/un-select "Display Quick Edit Button" to enable or disable Google Web Page Test and AMP HTML validation web page tester.
- Update the amount of posts to display on index pages.
Enable/Disable Quick Edit Tools
Un-tick/un-select "Display Quick Edit Button" to enable or disable Google Web Page Test and AMP HTML validation web page tester.
Sidebar Section
Views:

- Add, remove, re-arrange or edit Blogger widgets.
- Javascripts allowed.
- Not available in mobile views.
Plug-ins - Related Posts
Views:
Display
Required element attribute with
Variables
Required value:
Description: Set & display
Required value:
Description: The
Required value:
Description: The text to display as sectional heading. Accepts HTML characters. Leave empty to disable related post heading display.
Required value:
Description: The DOM element reference by
Required value:
Description: The
Required value:
Description: The
Required value:
Description: Displays related posts author. Leave empty to disable.
Required value:
Description: Displays related posts last assigned Label. Leave empty to disable.
Required value:
Description: The image width/size in pixels to display at posts. Add
Required value:
Description: The image height in pixels to display at posts. If
Required value:
Description: Fully qualified image url to display default image if post images is not found.
Required value:
Description: AMP specific values used with
Required value:
Description: Text rendered with image
Display
n amount of related blog posts by label/categories in random order according to the post last assigned Label.- Add "disable" (without quotes) at widget title to disable widget.
- Drag & drop widget to desired location in Layout.
- Custom set attribute at Layout > find Related Post gadget > click Edit.
- Refer variables below for customization.
<div id="related"></div>
Required element attribute with
id to attach re-constructed posts.Variables
randomRequired value:
true or falseDescription: Set & display
n amount of posts in random order if set to true.max_resultsRequired value:
integerDescription: The
n amount of posts to display at related section.headingRequired value:
stringDescription: The text to display as sectional heading. Accepts HTML characters. Leave empty to disable related post heading display.
container_idRequired value:
stringDescription: The DOM element reference by
id to append retrieved posts.title_charsRequired value:
integerDescription: The
n amount of character to display for post titles. If set to 0 post title is disabled.summary_charsRequired value:
integerDescription: The
n amount of characters to display at post summary. If set to 0, post summary is disabled.authorRequired value:
stringDescription: Displays related posts author. Leave empty to disable.
tagsRequired value:
stringDescription: Displays related posts last assigned Label. Leave empty to disable.
image_widthRequired value:
integerDescription: The image width/size in pixels to display at posts. Add
null to remove image display.image_heightRequired value:
integerDescription: The image height in pixels to display at posts. If
image_width is set to null, this attribute will not be honored.image_defaultRequired value:
url/stringDescription: Fully qualified image url to display default image if post images is not found.
layoutRequired value:
AMP specificDescription: AMP specific values used with
amp-img tags. If image_width is set to null, this attribute will not be honored.attributionRequired value:
stringDescription: Text rendered with image
attribution attribute. If image_width is set to null, this attribute will not be honored.Plug-ins - Comments
Views:
All available comments system pre-installed with theme & its custom settings.
All available comments system pre-installed with theme & its custom settings.
Disqus Comments
- Enable or disable comment widget by leaving widget title empty.
- Drag & drop, re-arrange comment widget positions accordingly.
- Create a free Disqus account & grab Disqus
shortnamethat you have assigned. Add your Disqusshortnameat Layout > find Disqus Comment widget > click Edit.
Google Plus Comments
- Enable or disable comment widget by leaving widget title empty.
- Drag & drop, re-arrange comment widget positions accordingly.
- At Layout > find Google+ Comment widget > click Edit.
Facebook Comments
- Enable or disable comment widget by leaving widget title empty.
- Drag & drop, re-arrange comment widget positions accordingly.
- At Layout > find Facebook Comment widget > click Edit. Add your Facebook App ID in widget Body then click Save.
Contact Form, Page & Settings
Views:
Requires Blogger contact form widget and custom contact form settings widget.
Enable Blogger contact form gadget by clicking Edit > then click Save to register widget to blog.
Custom set Blogger contact form alert at Layout > find Contact Form Settings widget > click Edit
Variables
Required value:
Description: Text displayed when contact form button is clicked.
Required value:
Description: Text displayed when successful submitted form.
Required value:
Description: Text displayed when form cold not be submitted or error during form submission.
Required value:
Description: Text displayed when email field is not provided.
Required value:
Description: Text displayed when the form message is not provided.
Upon sample pages upload, a contact page is installed. Find page & edit/add text in page editor to display text at contact page.
This page also comes with a theme helper to render Blogger contact form. Below is the example theme helper.
If this contact form helper exists, it will display the contact form inside its div. This helper can be used at any blog Pages.
The contact form functionalities is handled by Blogger platform. All form submission will be sent to the email addresses registered to the blog.
Requires Blogger contact form widget and custom contact form settings widget.
Enable Blogger contact form gadget by clicking Edit > then click Save to register widget to blog.
Custom set Blogger contact form alert at Layout > find Contact Form Settings widget > click Edit
var CONTACT = {
  'SendingMsg' : '<i class="fa fa-cog"></i> Processing...',
  'SentMsg' : '<i class="fa fa-check"></i> Thank you. Your message has been sent.',
  'NotSentMsg' : '<i class="fa fa-warning"></i> We\'re sorry. Message could not be sent, please try again later.',
  'InvalidEmailMsg' : '<i class="fa fa-warning"></i> Email address required.',
  'EmptyMessageMsg' : '<i class="fa fa-warning"></i> Message field cannot be empty.'
};
Variables
SendingMsgRequired value:
string/HTMLDescription: Text displayed when contact form button is clicked.
SendMsgRequired value:
string/HTMLDescription: Text displayed when successful submitted form.
NotSentMsgRequired value:
string/HTMLDescription: Text displayed when form cold not be submitted or error during form submission.
EmptyMessageMsgRequired value:
string/HTMLDescription: Text displayed when email field is not provided.
InvalidEmailMsgRequired value:
string/HTMLDescription: Text displayed when the form message is not provided.
Upon sample pages upload, a contact page is installed. Find page & edit/add text in page editor to display text at contact page.
This page also comes with a theme helper to render Blogger contact form. Below is the example theme helper.
<div id="theme-contact-page"></div>
If this contact form helper exists, it will display the contact form inside its div. This helper can be used at any blog Pages.
The contact form functionalities is handled by Blogger platform. All form submission will be sent to the email addresses registered to the blog.
Popular Posts Carousel (Mobile View)
Views:
- Uses custom Popular Posts widget with
amp-carouselfunctionalities. - Click edit & custom set widget & posts display
Plug-ins - Featured Bottom
Views:
Displays a collection of published posts using
Required element attribute with
Variables
Required value:
Description: Set & display
Required value:
Description: The
Required value:
Description: The text to display as sectional heading. Accepts HTML characters. Leave empty to disable related post heading display.
Required value:
Description: The DOM element reference by
Required value:
Description: The
Required value:
Description: The
Required value:
Description: Displays related posts author. Leave empty to disable.
Required value:
Description: Displays related posts last assigned Label. Leave empty to disable.
Required value:
Description: The image width/size in pixels to display at posts. Add
Required value:
Description: The image height in pixels to display at posts. If
Required value:
Description: Fully qualified image url to display default image if post images is not found.
Required value:
Description: AMP specific values used with
Required value:
Description: Text rendered with image
Required value:
Description: The amount in milliseconds each posts transition is delayed.
Required value:
Description:
Required value:
Description:
Required value:
Description: Display
Displays a collection of published posts using
amp-carousel component.- Display
namount of blog posts by recently published, by label/categories or in random order. - Add "disable" (without quotes) at widget title to disable widget.
- Custom set featured posts attribute at Layout > find Featured Bottom widget > click Edit.
- Refer variables setup below.
<div id="featured"></div>
Required element attribute with
id to attach re-constructed posts.Variables
randomRequired value:
true or falseDescription: Set & display
n amount of posts in random order if set to true.max_resultsRequired value:
integerDescription: The
n amount of posts to display at related section.headingRequired value:
stringDescription: The text to display as sectional heading. Accepts HTML characters. Leave empty to disable related post heading display.
container_idRequired value:
stringDescription: The DOM element reference by
id to append retrieved posts.title_charsRequired value:
integerDescription: The
n amount of character to display for post titles. If set to 0 post title is disabled.summary_charsRequired value:
integerDescription: The
n amount of characters to display at post summary. If set to 0, post summary is disabled.authorRequired value:
stringDescription: Displays related posts author. Leave empty to disable.
tagsRequired value:
stringDescription: Displays related posts last assigned Label. Leave empty to disable.
image_widthRequired value:
integerDescription: The image width/size in pixels to display at posts. Add
null to remove image display.image_heightRequired value:
integerDescription: The image height in pixels to display at posts. If
image_width is set to null, this attribute will not be honored.image_defaultRequired value:
url/stringDescription: Fully qualified image url to display default image if post images is not found.
layoutRequired value:
AMP specificDescription: AMP specific values used with
amp-img tags. If image_width is set to null, this attribute will not be honored.attributionRequired value:
stringDescription: Text rendered with image
attribution attribute. If image_width is set to null, this attribute will not be honored.carousel.delayRequired value:
integerDescription: The amount in milliseconds each posts transition is delayed.
carousel.loopRequired value:
integer (mandatory)Description:
amp-carousel container width in pixels.carousel.controlsRequired value:
integer (mandatory)Description:
amp-carousel container height in pixels.carousel.autoplayRequired value:
controls (AMP specific)Description: Display
amp-carousel arrow controls.Footer Section
Views:

- Add, edit & remove Blogger widgets accordingly.
- Drag & drop widgets to desired location.
- Add HTML, links, text, click to action.
- Use AMP components.
- Javascripts allowed.
- Remove widget javascript inserts when new widgets added.
Components
Views:
Custom widget to include amp components & custom fonts.

Custom widget to include amp components & custom fonts.
Google Analytics
- Update Google analytics unique id at Layout > find Analytic widget > click Edit.
Custom Fonts
- Available for web views.
- Uses Google custom fonts library.
- Customize Google fonts library and settings at Layout > find Google Fonts widget > click Edit.
AMP User Notification
Views:
Strictly for component usage. Adds a sticky component located at blog page footer on page view.
Strictly for component usage. Adds a sticky component located at blog page footer on page view.
- Example markup provided with widget.
Monetization
Offer Top
Views:


Example adding an
Example adding Adsense ad unit using
Some examples have been included in widget for personalization.
- Add HTML, links, text, click to action.
- Use AMP components (preferred).
- Javascripts prohibited.
- Remove widget javascript insert when new widgets added (required).
Example adding an
amp-img with a clickable link.<a href="your-link-url"><amp-img src="your-image-url" width="320" height"100"></amp-img></a>
Example adding Adsense ad unit using
amp-ad component.<amp-ad data-ad-client='ca-pub-1122334455668722' data-ad-slot='123456789' height='280' layout='fixed-height' type='adsense'/>
Some examples have been included in widget for personalization.
Ads Below Post Title (Single Pages)
Views:
- Strictly
amp-adcomponent - Replace
data-ad-clientto your Adsense unique publisher id. - Replace
data-ad-slotto your Adsense unique ads slot id. - Replace
heightvalue to your ads height. - For
layout="fixed-height"attribute width is set to auto. - Example
amp-admarkup provided. - Add "disable" (without quotes) to disable gadget.
Ads Below Post (Single Pages)
Views:
- Strictly
amp-adcomponent - Replace
data-ad-clientto your Adsense unique publisher id. - Replace
data-ad-slotto your Adsense unique ads slot id. - Replace
heightvalue to your ads height. - For
layout="fixed-height"attribute width is set to auto. - Example
amp-admarkup provided. - Add "disable" (without quotes) to disable gadget.
Ads Inner Posts (Index Pages)
Views:
Location: Theme > Edit HTML > select Blog1 widget > expand
Location: Theme > Edit HTML > select Blog1 widget > expand
<b:includable id='post-ads'/> - Strictly
amp-adcomponent - Replace
data-ad-clientto your Adsense unique publisher id. - Replace
data-ad-slotto your Adsense unique ads slot id. - Replace
heightvalue to your ads height. - For
layout="fixed-height"attribute width is set to auto. - Example
amp-admarkup provided.
Offer Bottom
Views:


Example adding an
Example adding Adsense ad unit using
Some examples have been included in widget for personalization.
- Add HTML, links, text, click to action.
- Use AMP components.
- Javascripts prohibitted.
- Remove widget javascript inserts when new widgets added.
Example adding an
amp-img with a clickable link.<a href="your-link-url"><amp-img src="your-image-url" width="320" height"100"></amp-img></a>
Example adding Adsense ad unit using
amp-ad component.<amp-ad data-ad-client='ca-pub-1122334455668722' data-ad-slot='123456789' height='280' layout='fixed-height' type='adsense'/>
Some examples have been included in widget for personalization.
AMP Sticky Ad
Strictly for
Views:
Views:
amp-ad usage. Adds a sticky component located at blog page footer on page view.- Enable amp-sticky-ad component at Theme > Edit HTML > find
var='amp-sticky-ad' - Update attribute
value='true' - Click Save Theme
Views:
amp-sticky-ad Mobile Views
- Strictly for
amp-aduse. - Requires
amp-adattributewidthandheightvalues in pixels.
Views:
amp-sticky-ad Web Views
- Strictly for
amp-aduse. - Requires
amp-adattributewidthandheightvalues in pixels.
Theme Optimizations
Theme Meta Data
Views:
This section covers theme optimization's in accordance to Accelerated Mobile Pages (AMP) & Google search engine guidelines -- additional support for search engines.


Drag & drop widget to preferred location in its sequence. Copy and paste social sharing codes on other HTML/Javascript to place elsewhere.
This section covers theme optimization's in accordance to Accelerated Mobile Pages (AMP) & Google search engine guidelines -- additional support for search engines.
Search Engine Meta
Twitter Card
Update twitter name & creator at marked red arrow. Replace text insidecontent="...".Post Image Fallback
var='defaultImage'- Upload an image min 900px X 475px in size via blog post editor.
- Get the image URL.
- Go to Theme > Edit HTML find variable above and replace the URL to your earlier uploaded image.
Mobile Icons
var='themeIcon'- Upload an image min 215px X 215px in size via blog post editor.
- Get the image URL.
- Go to Theme > Edit HTML find variable above and replace the URL to your earlier uploaded image.
Blog Favicon
- Use Blog favicon widget to update/upload favicon images.
Mobile Browser Bar
var='themeColor'- Choose the appropriate color for your theme and get the color HEX code.
- G ot Theme > Edit HTML panel adn find variable above.
- Replace
value="..."with your HEX color of choice. - Examples provided in theme.
Google Plus Page Links
Update Google plus publisher & author to link to assigned profile pages.Social Share
Social sharing buttons and amp components have been pre-installed. Example & code markup is included inside Ads widget located below Blog Post gadget.Drag & drop widget to preferred location in its sequence. Copy and paste social sharing codes on other HTML/Javascript to place elsewhere.